One of the recent mega trends is the Internet of Things (IoT), which already affects almost every part of our lives. Due to this fact I decided to setup my own project in terms of building a smart mirror. This connected mirror is intended to display several types of information on one nice screen, which acts as part of our furnishing.
The idea and: What exactly is a smart mirror?
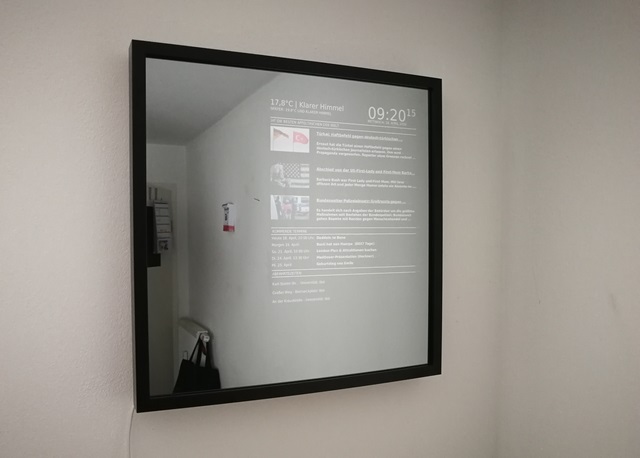 The initial version of the smart mirror software, using JavaFX
A common mirror on walls like in the bathroom, living room or just in the floor is quite stupid. I wanted to make use of this unused, prominent space in my apartment and thought about displaying some interesting information instead, which is useful for our daily workflows: Having breakfast and reading news, knowing the remaining time until the bus departs, current time and date and even more.
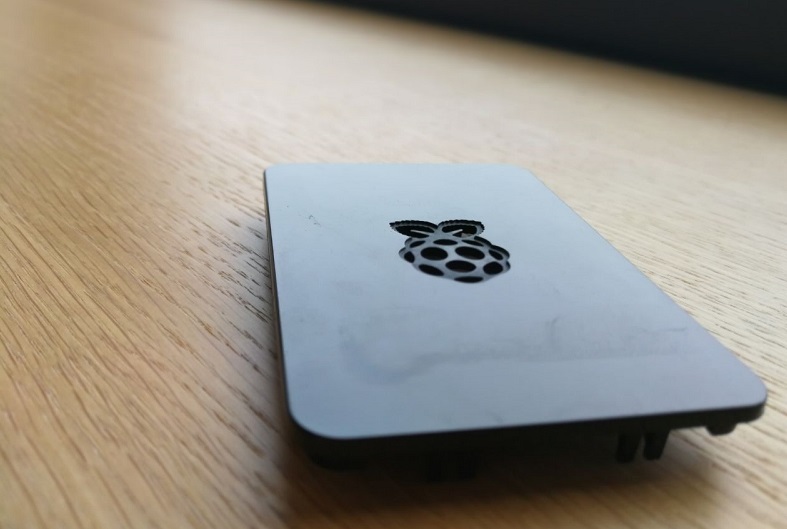
The difference to a standard mirror is a mini computer (RasperryPi), a LCD screen behind the mirror glass and some connectivity over WiFi.
Main features
- Web-Interface for configuration and parameterization of the device and displayed data
- Current weather and the forecast for the next hours and days for a certain city
- Current date and time incl. running seconds
- Calendar entries of the upcoming days (arbitrary number)
- RSS newsfeed of a desired news source
- Public transport data: Bus departure times and information of a certain bus stop
Public transport
Weather
Time & Date
Calendar
News
Requirements
The following requirements must be fulfilled by the mirror:
- Easy management (Updating data, accessing the RasperryPi)
- Low maintenance effort (Updating OS and software packages
- Low power consumption (Especially on 24/7 runtime)
- High flexibility when adding or customizing the presented data
- Sharp image and high-quality processing
The planning and designing
A few questions had to be clarified in advance:
- How large should the mirror be?
Of course, this depends first and foremost on the space available.
The larger the mirror, the larger the area that can potentially be digitized with a monitor. But this is also to be considered: A larger surface requires more glass, thus the weight of the construction increases, which affects the suspension on the wall.
However, the larger the screen, the higher the costs for the monitor. The software must of course also be adapted and tested accordingly. In general, there are no limits to the size of the monitor.
For this project I decided on a medium standard size of 52 x 52 cm (incl. frame). - What is a suitable place for the mirror in your apartment?In general, frequently visited rooms are a good idea. But often a quick glance at the time or the delay of the next bus is enough to get information. Rooms with high humidity, such as the bathroom, tend to be avoided to prevent damage to electronics.
- Which data should be presented?
In the article above, I have already mentioned the features that this smartMirror project has produced. These can be extended with additional features at any time. When it comes to data protection, information about the weather or from a newsfeed is of course harmless, but the situation is different with personal calendar entries. Depending on the later location of the mirror, it must be considered who can and may see the information.
- How is the heat of the Raspberry Pi and monitor dissipated?The Raspberry Pi generally impresses with its minimal power consumption and should therefore be disregarded in this question.
The monitor's electronics can theoretically result in heat accumulation, which must be prevented and therefore dissipated to the outside. I recommend to provide a gap of about 1cm between wall and mirror, through which the air can circulate. The heat exchange is done either by manually sawed ventilation slots in the wooden back wall, or by silent miniature fans, which are powered by the GPIO pins of the Raspberry Pi. In this case, smaller cut-outs in the rear wall are sufficient.
Tests have shown: If the mirror is carefully disconnected from the power supply after a certain period of operation (a few hours) or before leaving the apartment, there is no danger of overheating.
The rear wall can also be dispensed with completely, if the components are fixed correctly.
Hardware, material and costs
After some internet search and evaluation of my budget, I decided to take a simple wooden frame Holzrahmen (IKEA), which depth is enough to contain all components that the mirror will consist of (52 x 52 x 4 cm).
In order to present my contents, I made use of a pre-used 17 inch TFT (from Ebay). The surface of the mirror was initially built with a mirror film from the DIY store. This solution costed a bunch of nerves and the quality was not even good, so it was replaced by a spy glass.
| Description | Vendor |
| RaspberryPi 3 Model B | RaspberryPi |
| (Pre-used) TFT monitor, 17 inch | up to you |
| Power plug (microUSB) for the Raspberry Pi | Rydges |
| Euro 4-fold connector strip 1.5m (flat, white) | GAO |
| MicroSD card (16 GB) | Intenso |
| USB cardreader for für microSD cards | Media Markt |
| Plastic case for Raspberry Pi (black) | RaspberryPi |
| Spy glass (Mirror glass) 50x50 cm | Wehatherm (or local vendor) |
| Photo frame 'RIBBA', 52x52 cm, Depth: 4.5 cm | IKEA |
| VGA to HDMI adapter | UGreen |
| Extension cable (flat plug, white) | Kopp |
| C13 pwer cable for the monitor, right-angle connector | Conrad |
| VGA cable, as short as possible | - |
| Wago clamps (for 0.14mm² conductors) | Conrad |
| Litze (LiY 1 x 0.14 mm², 10m, schwarz) | Conrad |
| Black paper carboard paper (100x50cm), to darken the background | DIY store |
| Abisolierband (black) | DIY store |
| Double-sided tape (strong) | DIY store |
| 2 metal angles, 2-4 mm | DIY store |
Tools: Wood- and metal saw, pliers, screw driver, wood drills and and rasps
Material: Wooden rests (For the back of the mirror), wood plates and rubber as distance separators, double-sided glue strips
The building phase
At first, the monitor must be prepared: We don't need the plastic case and the metal around it. Depending on the depth of the LCD panel, the main board and the control unit must also be removed. They must be placed beside the display panel. By this, we save some centimeters to the back.
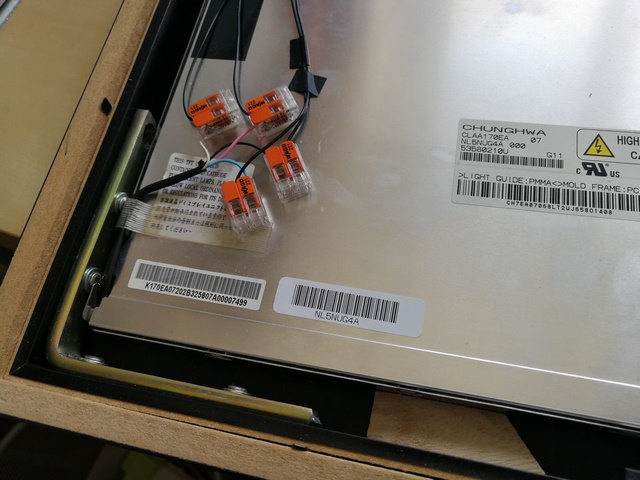
Because the length of the original cables might be too short, we extend them by using Wago clamps. The front of the metal frame would reflect the light when looking at the mirror - we put some black tape on it, so the silver frame disappears.
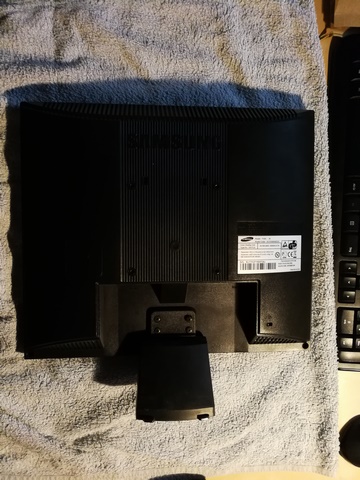 The back of the original monitor
 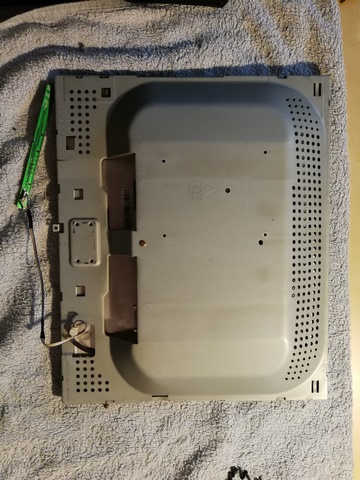 The monitor, whose plastic housing has been removed
 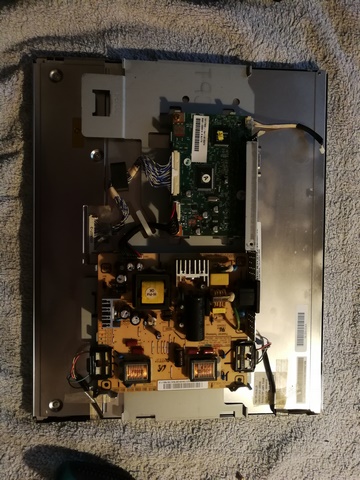 The inner workings of the monitor, without metal housing
 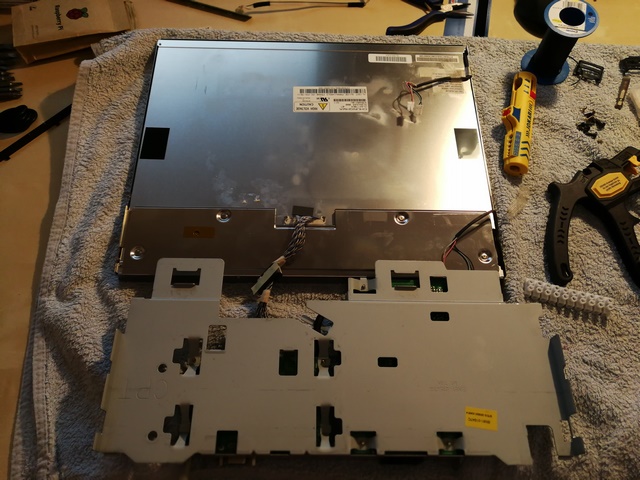 The removed metal housing (still in one piece)
 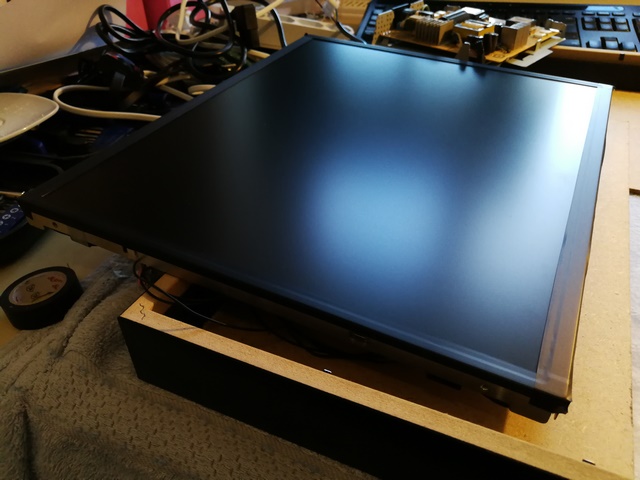 The metal frame of the screen taped with black insulating tape, in order to avoid unwanted reflections
 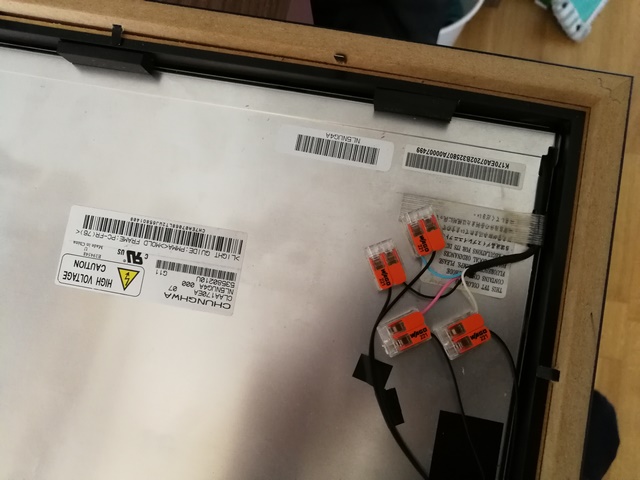 The supply line to the lighting unit of the monitor extended with strands and Wago clamps: 4 pieces at the connection of the monitor visible here, 4 pieces at the main board
As the lowest layer / the front layer (depends on your view) we use our spy glass. This is the first layer to put, when starting building the mirror.
To avoid the LCD panel from moving around, we fix it at each corner with some tape on the spy glass from the DIY market.
In order to prevent brightness from behind the mirror from falling into the interior and affecting the mirror image, all the space in the visible area of the frame that is not filled by the monitor must be darkened. Black clay cardboard is suitable for this purpose. In addition, a back wall of a cabinet that is no longer needed, for example, proves to be useful to create an additional distance between the electronics and the mirror glass. A further advantage of this wood layer is that the screen is jammed and can therefore no longer slip to either side.
The material is cut to size and inserted into the frame:
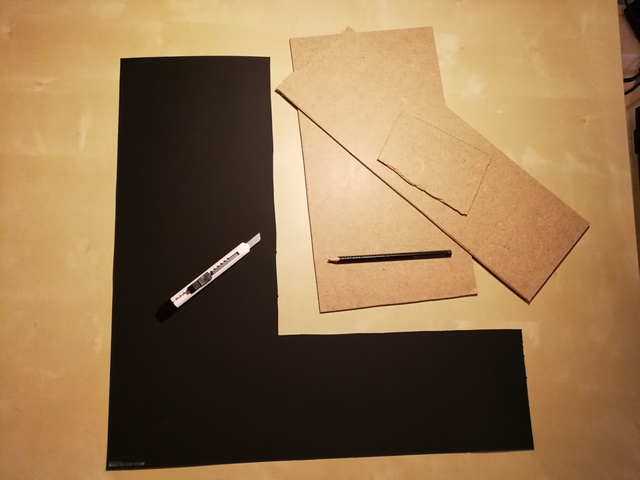 Matching cut clay cartoon and thin wooden panels to separate the back of the frame from the visible area
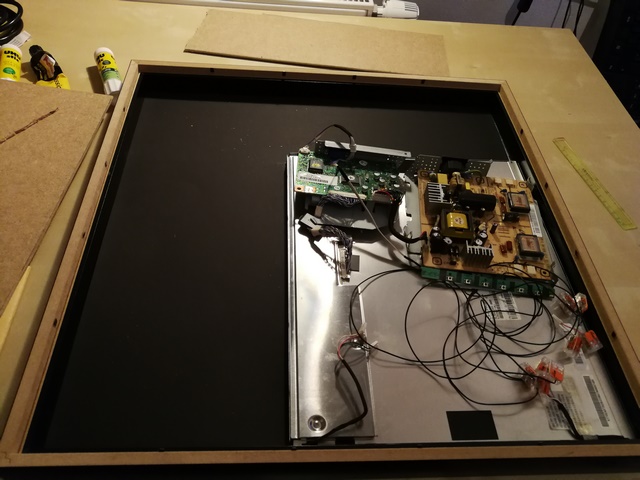 The clay carton that fits into the frame. Make sure it is flush with the frame so that no light can shine through
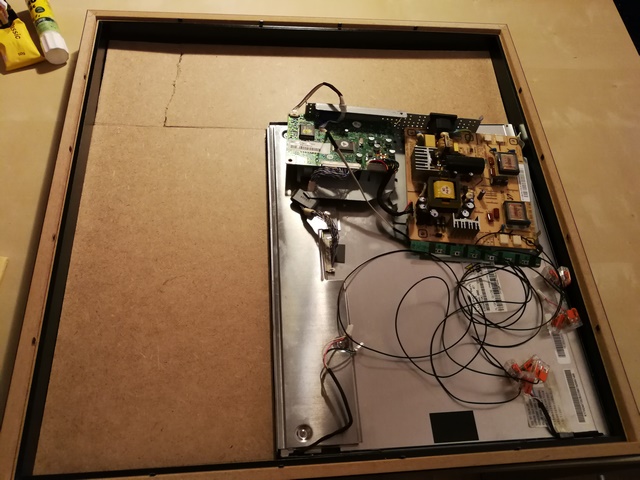 The additional wooden parts inserted into the frame (as spacers)
The electronics of the monitor used here were originally attached to special metal mounts. A reuse is advisable so that the components do not slip when the mirror hangs vertically on the wall later. To save as much space as possible, the metal parts were separated and all superfluous parts were removed with a metal saw. The fixing to the wood was done with adhesive strips on both sides.
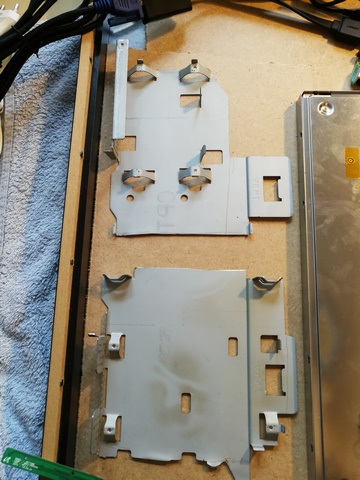 The metal sockets of the electronics. They have been separated to allow a more flexible insertion into the frame
 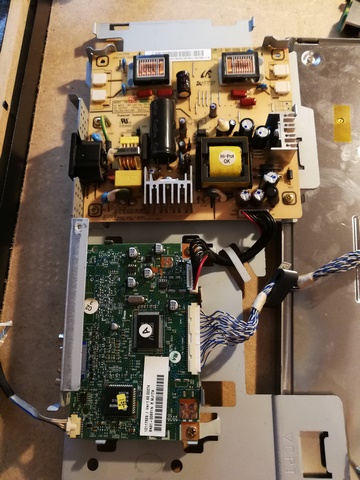 The boards that have been put back into their socketsNow all components must be wired together again. Due to its age, the monitor does not have an HDMI output, but a VGA port instead. Because the Raspberry Pi is therefore incompatible, an HDMI-VGA adapter and a classic VGA cable are used. The power cable of the monitor and the Raspberry Pi are connected to the white power strip (bottom right in the frame).
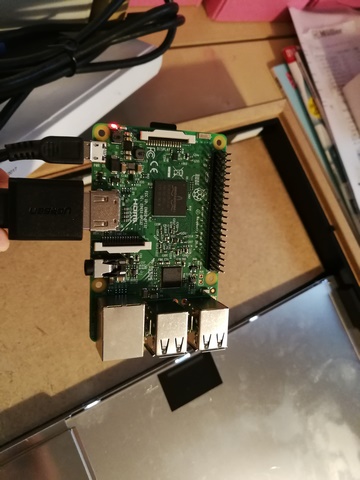 The heart of the mirror, the Raspberry Pi, finds its place at the top right of the frame
 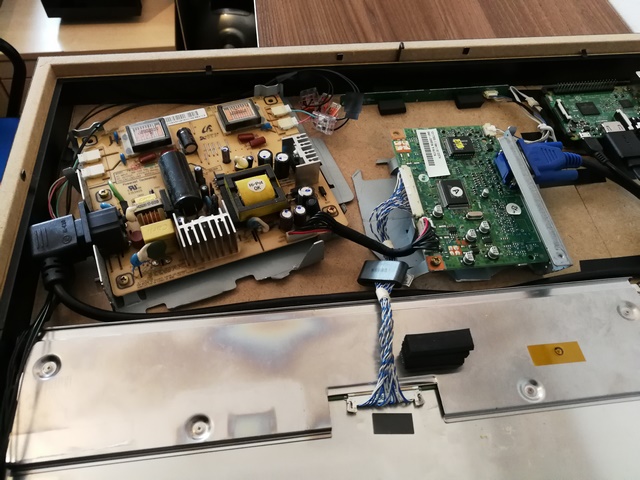 The general view of the inner life of the mirror. All parts are already wired together, on the right side you can see the Raspberry Pi
 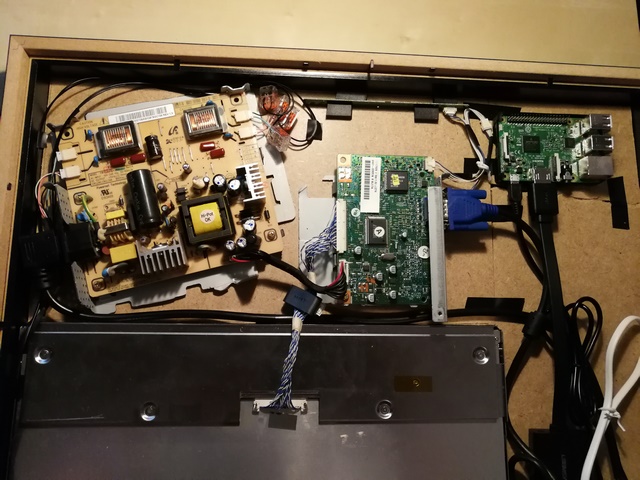 The general view of the inner life of the mirror. All parts are already wired together, on the right side you can see the Raspberry Pi
The mirror has - mainly because of the glass pane - a quite high weight. To ensure that it stays in place, it should be reinforced at the two corners where it is fixed. Here two angles are used, which are drilled into the wooden frame with four screws each as shown. Finally, the rear panel supplied with the frame can be attached (if the depth of the components fits completely into the frame).
 The corners of the frame were reinforced by one angle each. The visible small wooden spacers ensure that the screen does not slip. From the other side, the wooden parts that have been laid over the clay cardboard support
 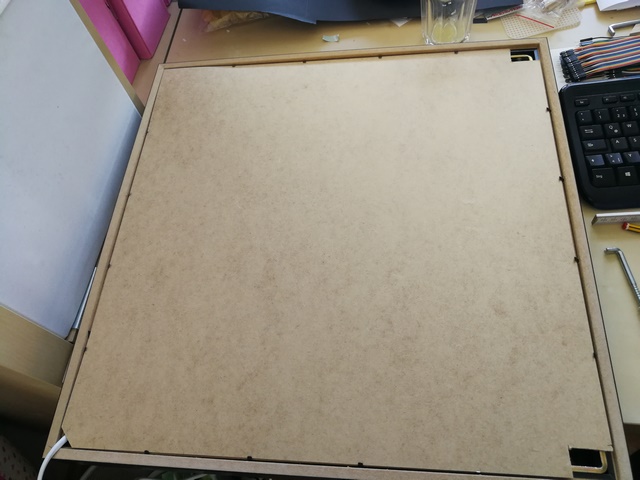 The rear wall of the mirror is held by the metal hooks as intended. They are inserted through the two openings in the rear wall
Two slot-hook angle screws are used for fixing to the wall, which are held by dowel holes. The mirror can be hung up through recesses in the rear wall at exactly the places where the hooks are to reach under the angles fixed to the frame.
The software and the user interface
The very first version of the software was realized with mirrOS (props go out to the guys). Das mirrOS-Logo
A few weeks later, I was proud to release my own software, which was written with JavaFX, based on Raspbian Jessie. It came along with a separate apache web server, hosting the configuration interface where the user was able to configure his modules.
The latest version now runs an installation of the openSource project MagicMirror² - it is running based on NodeJS and comes with the popular notification system and a growing number of modules. One of these modules was even built by myself - it collects live transport data for the bus departures in Regensburg (RVV).
Feel free to ask, if you want to have more information about the build process or want to give hints about this project!


